

You wipe the black line along the bottom of your shower, it looks clean for a day, then the dark streak comes right back. That pattern tells you something specific about what you are dealing with, and it changes how you should treat it.
Mold on shower caulk falls into two camps. Sometimes it sits on the surface of the silicone or grout, where a cleaner can reach it. Sometimes it has worked its way into or behind the caulk bead, where no spray will ever touch it. Treating the second kind like the first is why so many people scrub the same spot for months. This guide walks you through both, in the order I teach it to our crews at Eco Cleaning here in New York.

First, figure out which kind of mold you have
Before you buy anything, do a two-minute test. Dry the caulk line with a towel, then look straight at it under good light.
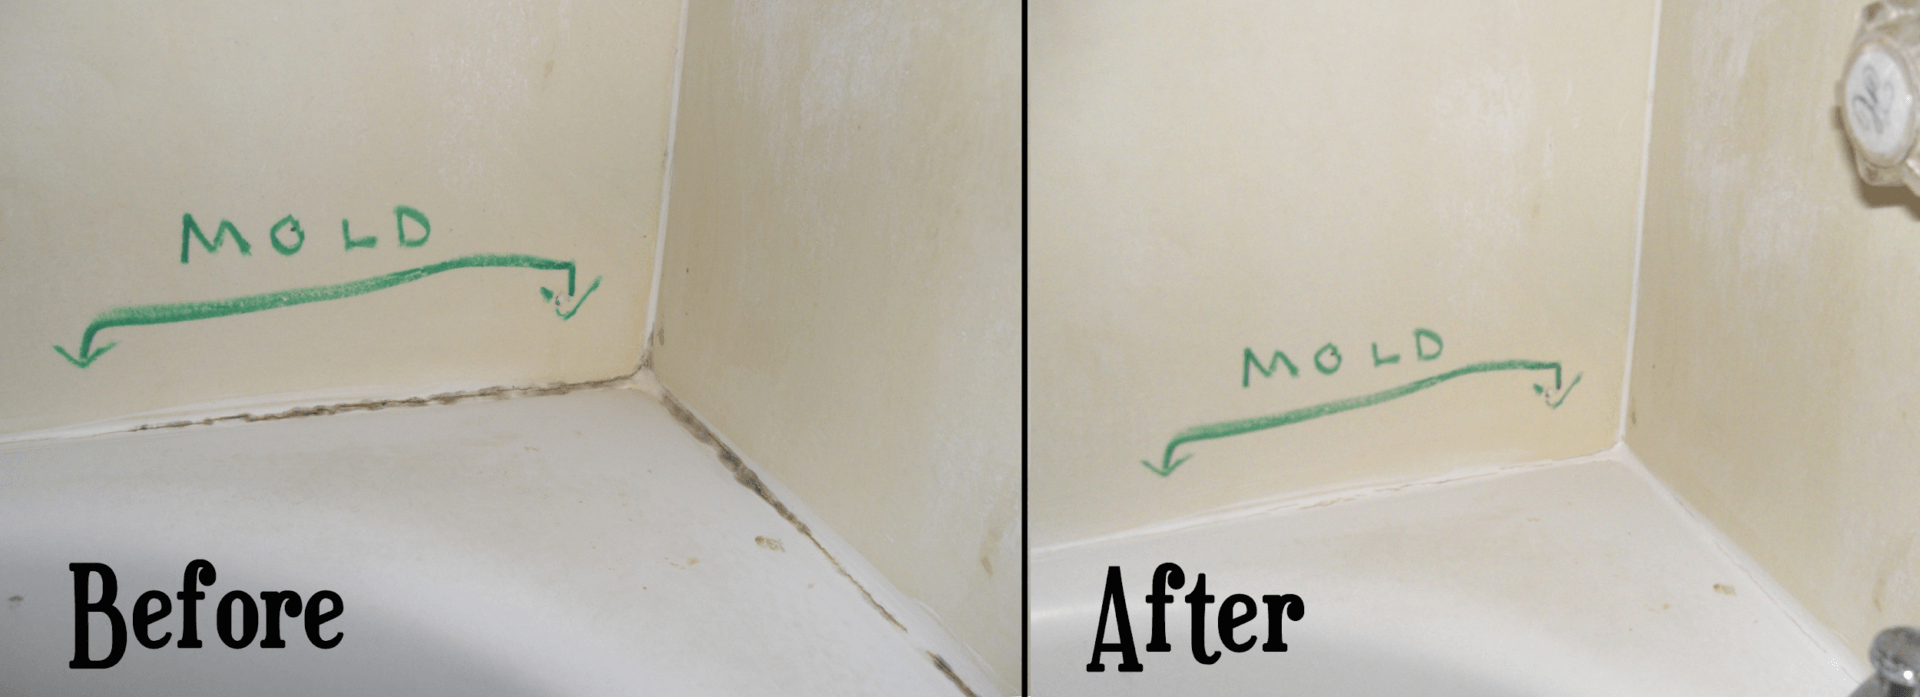
Surface mold looks like a film or scattered spots sitting on top of the caulk. Run a paper towel with a little cleaner over it and the color lifts, even if it takes a few passes. That is the version you can clean.
Mold that has grown under the caulk looks different. The discoloration lives inside the silicone or in the seam where the caulk meets the tile or tub. You scrub, the surface comes clean, and the stain is still there, like a shadow trapped under a layer of glass. If cleaner will not budge it after honest effort, the mold is behind the bead. No amount of bleach fixes that, because the bleach cannot reach where the mold is feeding.
Knowing which camp you are in saves you the frustration of steps 6 and 7 below when you only needed steps 1 through 5, or the reverse.
What you need
Keep the kit small:
- Nitrile gloves and eye protection
- An old towel and a stack of paper towels or cotton pads
- A spray bottle of white vinegar
- A stiff plastic brush or an old toothbrush
- Good airflow (window open, exhaust fan on, or both)
A quick word on chemicals. Vinegar handles most surface mold on its own. Bleach works faster on stubborn black staining, but never mix the two, and never combine bleach with any ammonia cleaner. That reaction produces a toxic gas. Pick one product per session and ventilate the room the whole time.

Cleaning surface mold, step by step
1. Ventilate and protect yourself
Open the window and run the fan. Put on gloves and eye protection. Mold spores and cleaning fumes both belong outside your lungs.
2. Lay a soaked compress on the line
Soak a strip of paper towel or a row of cotton pads in white vinegar and press it directly onto the moldy caulk. The compress keeps the vinegar in contact with the surface instead of running off into the drain, which is the whole trick. Let it sit for two to three hours.
3. Scrub along the seam
Peel off the compress and work the toothbrush along the caulk line, following the seam rather than crossing it. Most surface mold releases here.
4. Rinse and dry completely
Rinse with warm water, then dry the caulk with a towel. Drying matters as much as cleaning, because leftover moisture is what invited the mold in the first place.
5. Judge the result honestly
If the line is clean, you are done. If a gray or black shadow stays behind after real scrubbing, stop. You have surface-cleaned all you can, and the remaining stain is mold living under the caulk. That is your signal to recut and reseal.
For heavier black staining that vinegar leaves behind but that still lifts under a cleaner, a bleach compress applied the same way (soaked pad, left in place, ventilated, then rinsed and dried) often clears it. If it does not lift, the mold is underneath, and cleaning is over.

When cleaning is not enough: recut and reseal
Old caulk that has mold growing inside it has failed. The silicone has lost its seal, water is getting behind it, and the mold has a food source you cannot reach. The fix is to remove the bead and lay a fresh one.
6. Cut out the old caulk
Score both edges of the bead with a utility knife or a caulk-removal tool and lift the strip out. Pull out every scrap, including the discolored pieces hiding in the corner. A caulk softener from the hardware store helps if the old silicone is stubborn.

7. Dry, then reseal
Clean the empty seam and let it dry for several hours. Damp gaps trap moisture behind the new bead and the mold comes right back. Apply fresh mildew-resistant silicone caulk made for bathrooms, smooth the bead, and give it the full cure time on the label before you run water. Do not rush this part. A bead that gets wet before it cures will peel within weeks.

Keeping mold from coming back
The seven steps above are the cure. These habits are the prevention, and they matter more, because a dry surface gives mold nothing to grow on.
- Squeegee after every shower. Thirty seconds on the walls and the caulk line removes the standing water mold needs. This one habit does more than any cleaner.
- Run the exhaust fan for 20 to 30 minutes after showering. If you do not have a fan, crack the window and leave the door open so the room dries.
- Wipe the caulk line dry a couple of times a week. A dry towel along the seam takes seconds and breaks the cycle.
- Watch for early graying. Catch it as surface mold and a vinegar wipe handles it. Ignore it and you are back to cutting out caulk.
- Replace caulk that will not clean. Silicone is cheap. Once a bead has gone dark inside, resealing is the honest fix, not another scrub.
When to bring in a pro
Sometimes the shower is not the only problem. If mold keeps returning across a whole bathroom, spreads onto walls or the ceiling, or the room never dries no matter what you do, you may have a ventilation or moisture issue behind the tile that no caulk change will solve. That is worth a professional set of eyes.
At Eco Cleaning, we have worked in New York bathrooms since 2016, and our crews train on deep cleaning for bathrooms, furniture, and carpet using steamers and plant-based products. When we take on a bathroom deep clean, we work through a 50-point checklist and document the finished job with photos, so you can see the seams and corners you never get to yourself. Every job is backed by our 100% satisfaction guarantee: flag anything within 24 hours and we re-clean the spot within 48. If your bathroom needs more than a caulk refresh, our heavy-duty cleaning service is built for exactly that level of buildup.
Whether you handle it yourself with a squeegee and a vinegar compress or call us at (929) 531-6264, the goal is the same: a caulk line that stays white because it stays dry.
By Alex Sonier, CEO & Head Trainer, Eco Cleaning NYC


